The
Virtual Classroom tool can be used for many purposes. Instructors can use
Virtual Classroom sessions for:
· Office
hours when in a different location than the student(s)
· Online
group meetings and presentations
· Invite
guest speakers from other locations
There
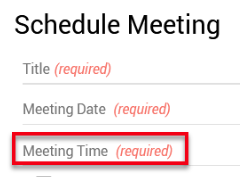
are a few key points for using the Virtual Classroom tool:
· Max
participants - 50 (that are listening by phone or computer)
· Max
participants sharing their Webcam - 10
· If
the presenter has plans to share the desktop, then the presenter must use
Chrome as the internet browser and download a Chrome extension: Bongo Screenshare
Extension.
· Session recording
availability - 14 Days
· Max number of Sessions
- 250/week
· Device Compatibility: View Compatibility
· Browser Compatibility: View Compatibility
This
tutorial demonstrates how to create a virtual classroom session from the
navigation bar.
1. Locate
the desired course in MyFIRE.
2. Select
the course tools tab at the top of the page in the navbar.
3. Select virtual classroom in the drop-down menu.

4. Select
the red plus icon at the bottom right of the screen to create a virtual
classroom session.

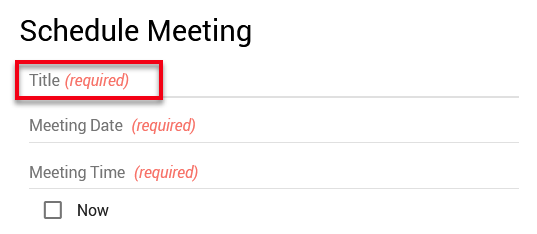
5. A
pop-up window will appear. Name the session in the title field.
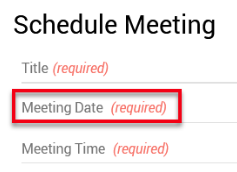
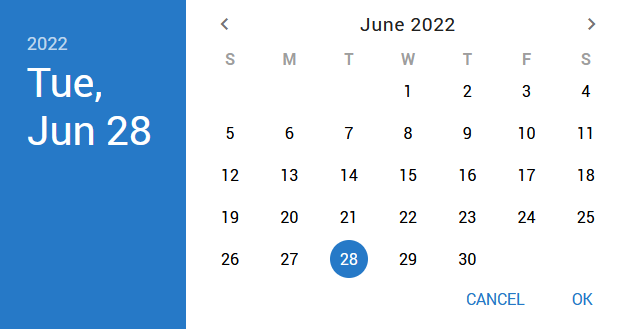
6. Next,
select meeting date. A pop-up calendar will appear to aid in selecting
the desired date.
Notes:
· Students will not be able to enter the session until the
instructor in the course has entered, regardless of the start time.
· Neither the instructor nor students can enter the session
until the session start time has passed.
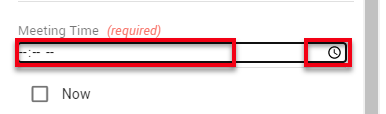
7. Then
set a time for the session by typing in the meeting time field or
selecting the clock icon.
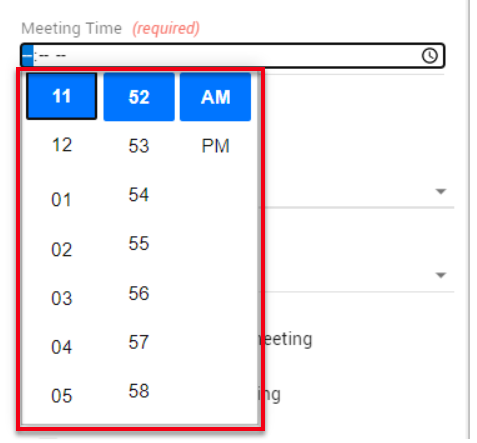
a. If the clock icon is
selected, a drop-down menu will appear to aid in the selection of the meeting
time by individually selecting the hour, minute, and time of day when
the session will start. To change the hour, minutes, and time of day, scroll up
and down through the drop-down menu. The selected time settings will be
highlighted in blue.
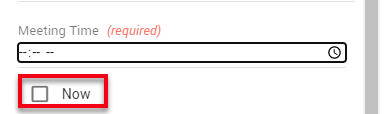
b. Or, if desired, select
the “Now” checkbox to start your meeting immediately.
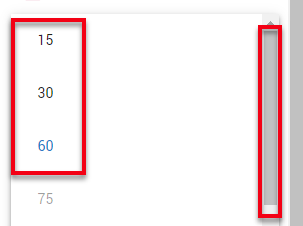
8. Set
a duration length. A drop-down menu will appear. Options include 15, 30,
and 60-minute sessions. If needed, use the scroll bar to view all
options.
Note:
The maximum duration is 60 minutes. If your session is longer than 60 minutes,
back-to-back sessions will need to be created.
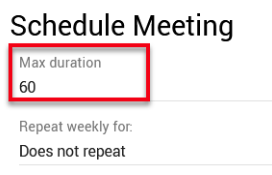
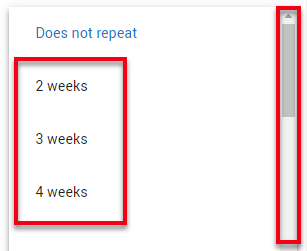
9. If
the session should be a repeated session, select how many weeks the Virtual
Classroom Session is to repeat by selecting does not repeat. A drop-down
menu will appear. Options include 2-15 weeks. If needed, use the scroll bar to
view all options.
Note:
The ‘Invite entire class’ setting must be selected for the Repeating
setting to be available. See step 13 for further details. The ‘invite entire
class’ setting will be enabled by default.

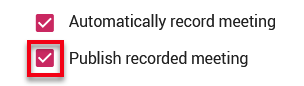
10. If
desired, start recording automatically by selecting the automatically record
meeting checkbox. As the presenter, you will also have the option to
manually select and start recording during the session as well. Manually
starting the recording will allow you time to make any needed adjustments
before the recording begins.
11. To
publish the session and make it available for students, select the publish
recorded meeting checkbox. This option will automatically publish the
recording after it has ended. The recording may take a little time to become
available.
Note:
The recording will only be available for 14 days after the scheduled session.
12. If
external participants are allowed, such as a guest speaker, to the virtual
session, select the allow external participants checkbox. Selecting this
option will also provide a phone number where participants can call into the
meeting.

13. Choose
if the session will be for the whole class, for a select group of students, or
for individual students in the course. If the session is for individual
students, unselect the invite entire class checkbox as the entire class
is selected by default. Participants can be selected after creating and saving
the session (step 15c).
Note:
If you are inviting individual students or a subgroup of students, the virtual
classroom session cannot be added to the content and assessment page.

14. Select save.

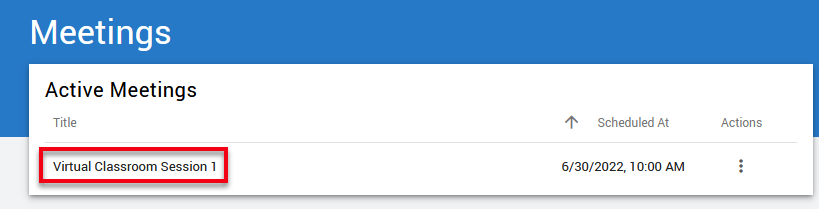
15. The
newly scheduled session will appear under the Active Meetings heading on the
Virtual Classroom tool page. Locate the session.
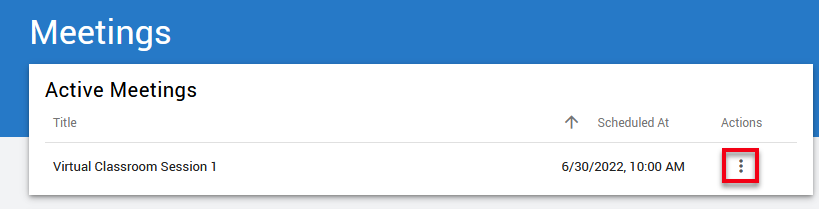
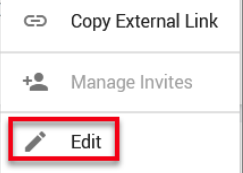
16. Select
the ellipsis icon on the right side of the page for the desired session
to access additional options. A drop-down menu will appear.
a. Launch- Select launch to
open and start the desired session. The session will open in a new browser
tab.

b. Copy External Link- Select copy
external link to obtain a direct link to the session to share with the
desired participants. This option will only appear if the allow external
participants setting was enabled when the meeting was scheduled. Refer to step
12.

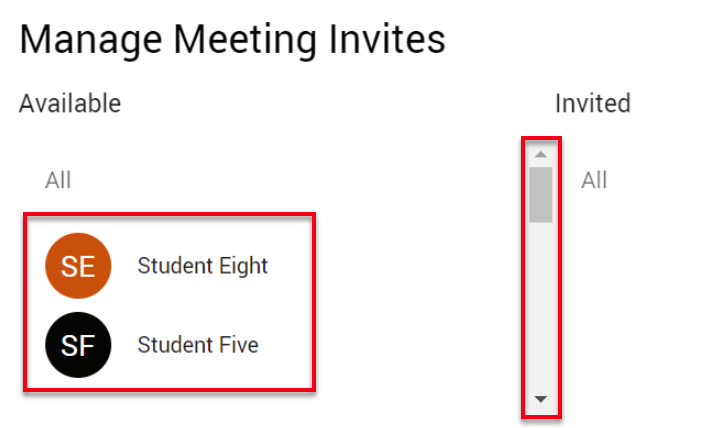
c. Manage Invites- Select manage
invites to add individual participants or a group of participants from the
class. This option will only be available if the invite entire class checkbox
was unselected in step 13. A pop-up window will appear.

i. Next, choose the
desired participants that should be invited to the virtual classroom session by
selecting their names. If needed, use the scroll bar to view all of the
participants.
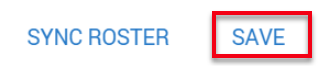
ii. If you do not see your
course roster, select sync roster at the bottom of the pop-up
window.

iii. Once done selecting the
desired participants, select save.
d. Edit- Select edit to edit the session. Note: If the session has reached its scheduled time, or
if the “Now” button was selected when creating the meeting, the edit
feature will not be available.
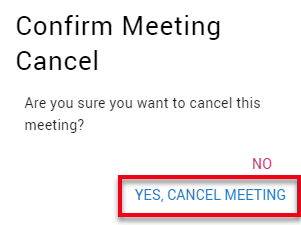
e. Cancel- Select cancel to
delete the meeting. A pop-up window will appear to confirm if you would like to
cancel the session.

i. Select yes, cancel
meeting to confirm the cancellation.