
Professors need to manage
many different aspects of a course, including dates. The manage dates tool
allows instructors to manage all of the dates in a course from one location.
This tutorial demonstrates how to change dates within a course with the manage
dates tool in MyFIRE.
Note: If Start or End
dates are added to a learning activity, an assessment, or to course content,
these dates will restrict students’ ability to view and access the item.
- A start date will restrict
students from accessing and submitting to an activity before the start
date.
- An end date will restrict
students from accessing and submitting to an activity after the end date
has passed.
- A due date will not restrict students from accessing and submitting to an activity before or
after the due date, unless a start and/or end date has been enabled in
addition to the due date.
1. Navigate to the desired course in MyFIRE
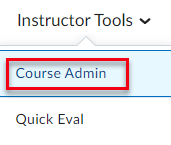
2. From the navigation bar at the top of the page. Select the instructor
tools tab.
3. A drop down menu will appear. Select course admin.
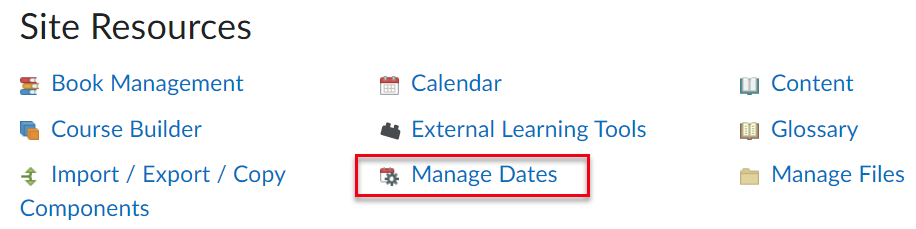
4. When the page refreshes, select manage dates.
5. Instructors have the option to filter by tool when needing
to manage dates. Instructors can choose all or choose the specific
tool(s).
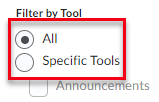
a. If specific tools are selected, choose the desired tools that require date changes.
Note: It is not
recommended to add start or end dates to grades. If enabled, students will lose
access to view the specified grade item in the gradebook.

6. If desired, select show advanced filter options to
filter the search by item name, due date, start date, end date, duration, and
calendar status.
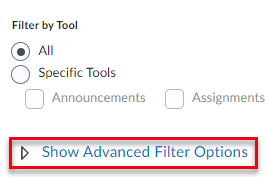
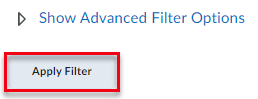
7. Then select apply filter.
8. Follow the directions for either the A, B, or C options
below depending on the desired outcome.
a. If changing dates for multiple items and the new dates
and times are all going to be different, then scroll down the Manage Dates
page to view the table with the filtered items.
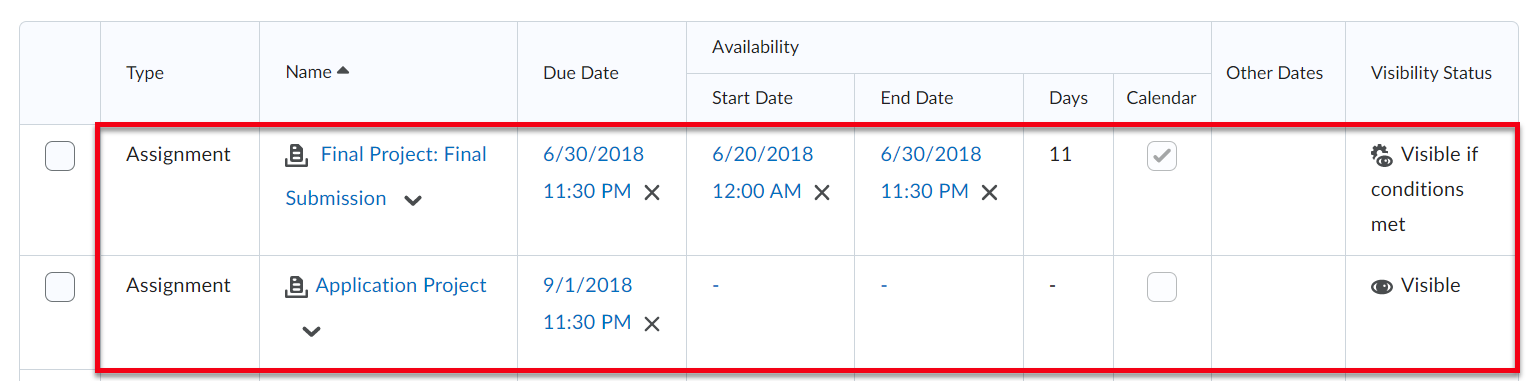
i. Locate the item on the table.
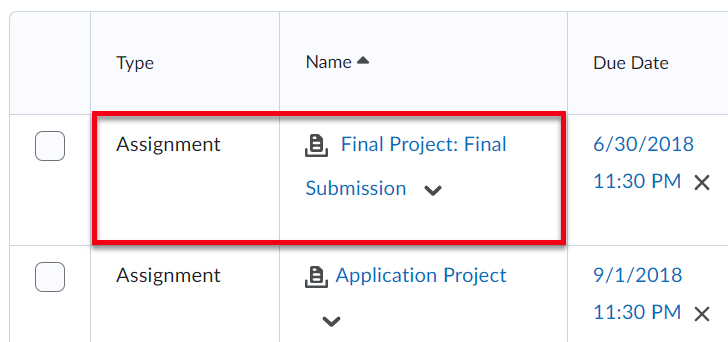
ii. Select the due date, start date, and/or end date cell(s).
iii. Once selected, a pop-up window will appear. Change the
dates and times to the new desired dates and times.
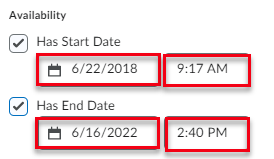
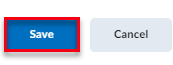
iv. Then select save at the bottom of the pop-up
window.
b. If changing the dates for
multiple items and the new dates will all be the same date and time, check
the box to the left of the item(s) that the date needs to be edited.
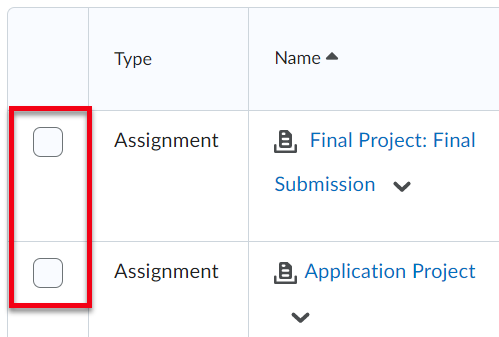
i. Then select bulk edit dates above the table. Bulk
Edit Dates allow instructors to enter a specific date for the selected
items.
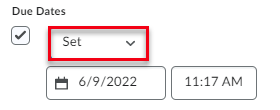
ii. Once selected, a pop-up window will appear. Set the due
date, start date, and/or end date to the new desired date for all of the
selected items by checking the corresponding checkbox, entering a date &
time.
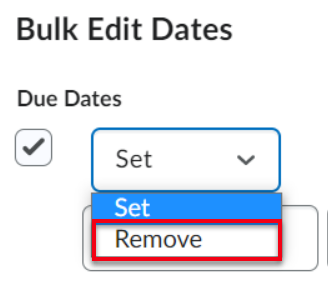
1 If desired, instructors can remove current dates and times
without adding new dates and times by selecting the set drop-down menu and changing the option to remove.
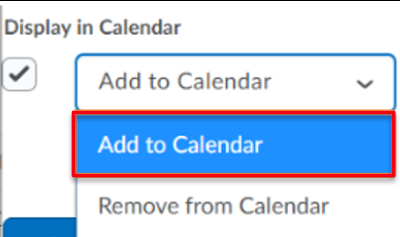
iii. Select the checkbox to display the date(s) in the calendar if desired.
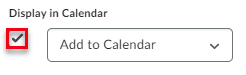
1 Once the checkbox is
selected, choose add to calendar from the drop-down menu.
iv. Then select save at
the bottom of the pop-up window.
c. If changing the dates for multiple items and the new
dates and times will need to be changed by a designated period of time (ex:
90 days), check the box to the left of the item(s) that the date needs
to be edited.
i. Then select bulk offset dates above the table. Bulk
Offset Dates allows instructors to change the dates in bulk
for the selected items by entering a designated date range.
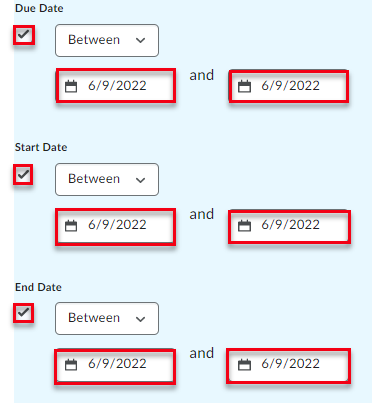
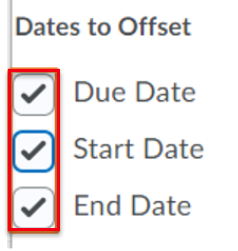
ii. Once selected, a pop-up window will appear. Choose which
date type should be offset: due date, start date, and/or end date.
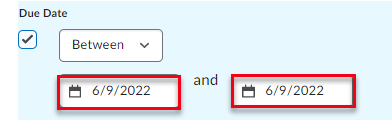
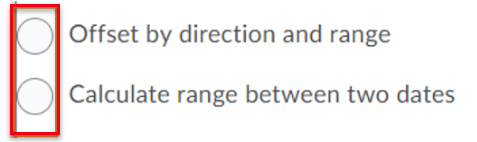
iii. Then choose either offset by direction and range or calculate
range between two dates.
1 If Offset by Direction
and Range is selected, the menu will expand. This option will automatically
change the date of the desired item by a specified number of days.
a. Choose either a forward
or backward direction for the days and hours fields by selecting the direction
drop-down menu for each field.
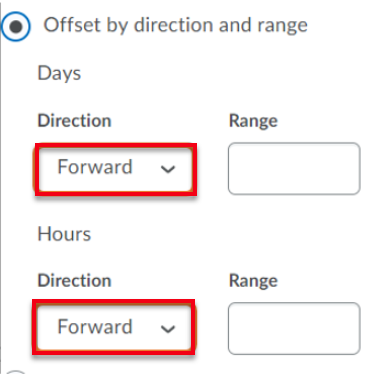
b. Then choose the range for
the days and hours by entering the number of days and/or hours that the
dates need to be changed forward or backward in the calendar.

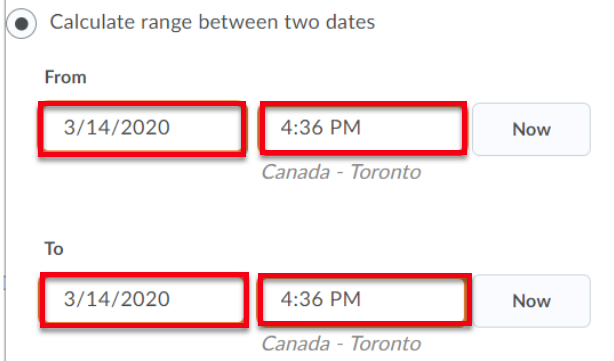
2 If Calculate range
between two dates is selected, the menu will expand. This option will
automatically change the date of the desired item to the date in the middle of
a date range.
a. Enter a “from” date and
time and a “to” date and time.
3 Select save at the
bottom of the pop-up window.