
To
create a discussion topic where students can post, a discussion forum and a
discussion topic both have to be created. A discussion topic cannot exist
without creating a discussion forum first. Discussion topics are nested under
discussion forums and can be connected to the gradebook. Additionally, students
can only submit to a discussion topic. This tutorial demonstrates how to create
a discussion topic in MyFIRE.
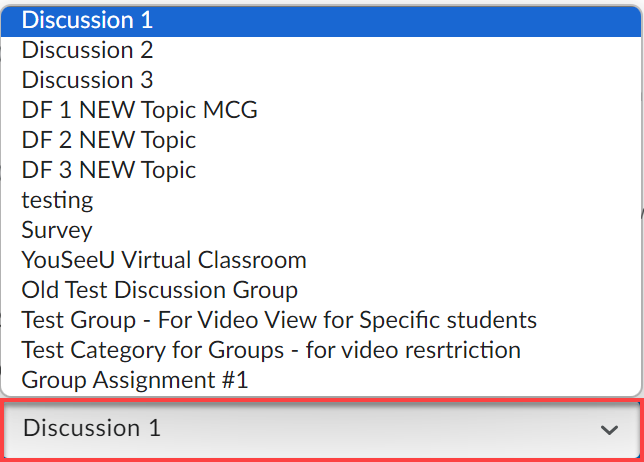
1. Locate the desired course in MyFIRE.
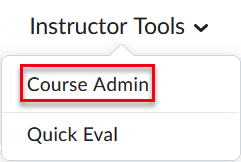
2. Select
the instructor tools tab in the navigation bar at the top of the page.
3. Select
the course admin tab in the navigation bar at the top of the page.
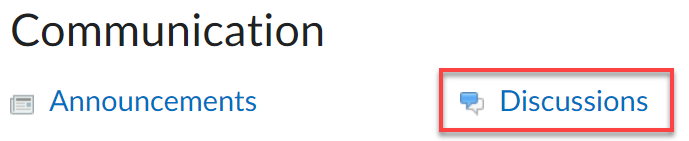
4. Select discussions from the Communication options.
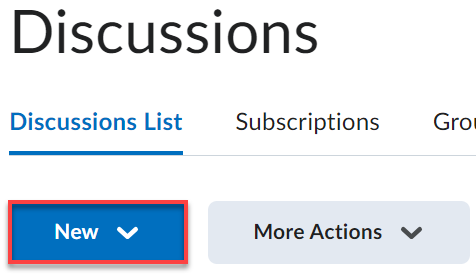
5. When
the page refreshes, select new.
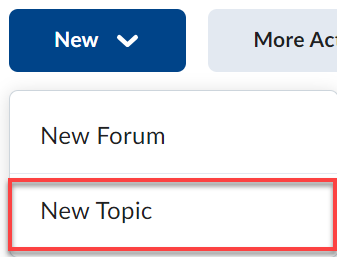
6. A
drop-down menu will appear. Select new topic.
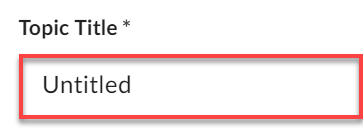
7. When
the page refreshes, title the discussion topic in the name field. Note:
We recommend naming the discussion topic the same name that is listed in the
course syllabus to alleviate possible confusion for the students.
8. A
forum is a way to categorize topics. The forum can be changed by selecting Change
Forum.
a. The following settings
can be used to select a forum option to organize the discussion topic:
i. A forum can be created
by selecting Create a Forum.
1. Enter a Forum Title.
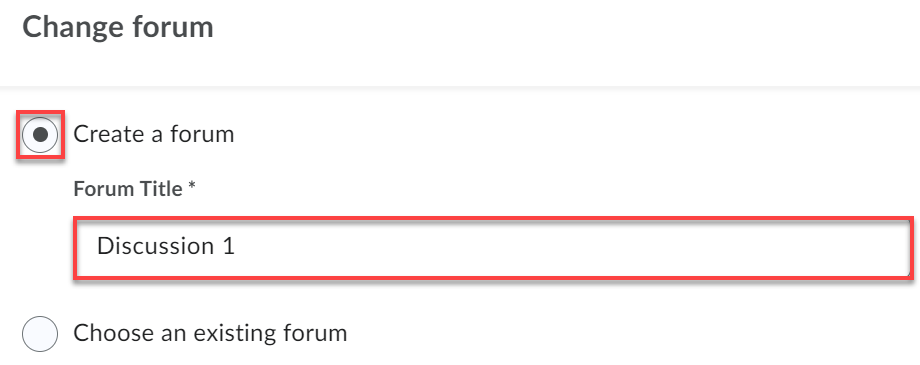
2. Select Apply Changes.
ii. Alternatively, an
existing forum can be chosen by selecting Choose an existing forum.
1. Select the drop-down
menu that appears and select the desired forum.
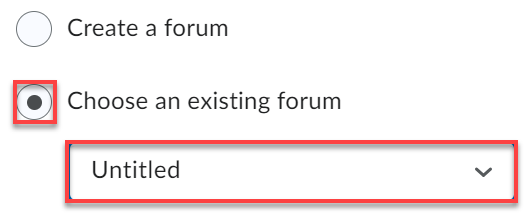
2. Select Apply Changes.
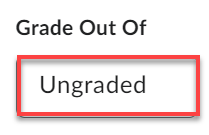
9. Next, to enter the desired number of points the discussion will
be worth and associate it with the grade book, select the Grade Out Of field.
10. Enter
the maximum points for the discussion in the Points field (based upon
what is listed in the syllabus and the grade book so that the point values
match across the course).

11. Next,
select the drop-down arrow next to In Grade Book and select Edit or
Link to Existing.

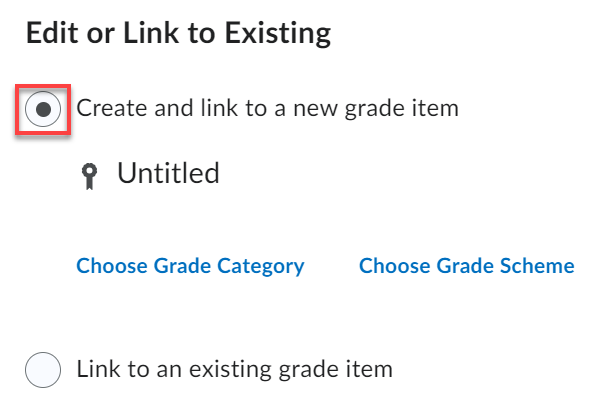
12. In
the pop-up window, connect the discussion to a grade item by selecting one of
the following options:
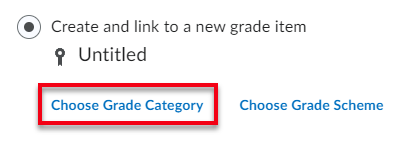
a. Option 1: Create and
link to a new grade item.
i. Then select the desired
category that the new grade item will be nested under by selecting choose
grade category. Note: The newly created grade item will not appear until
this discussion has been saved and closed.
ii. The pop-up window will
expand to show a drop-down list of the available categories in the grade book.
Select the grade category drop-down menu and choose the desired
category.
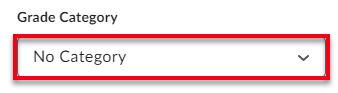
iii. Then select OK at the bottom of the pop-up window.
b. Option 2: Link to an
existing grade item.
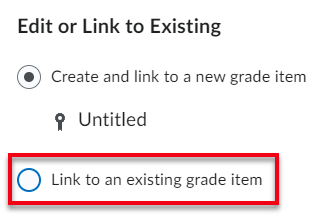
i. A drop-down menu will
appear. Select the existing grade item that you would like the discussion topic
to be associated with.
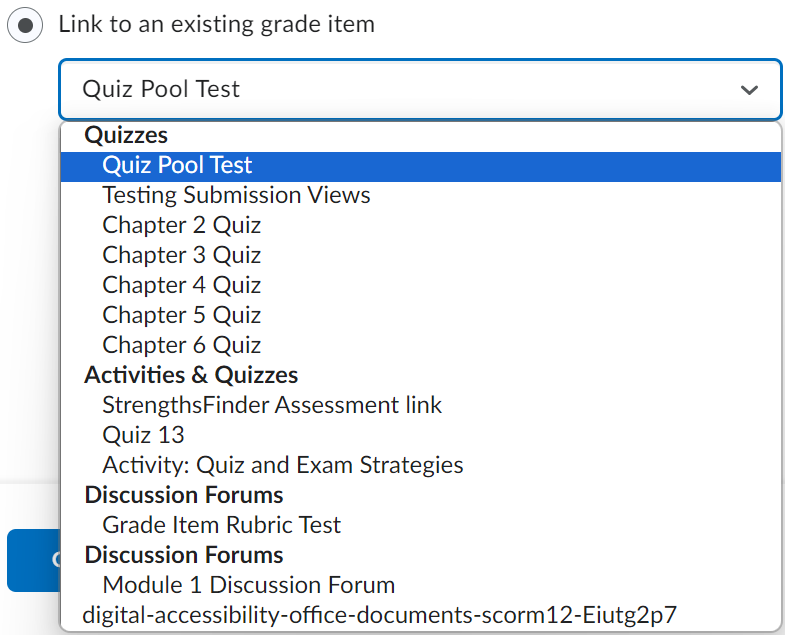
ii. Select OK.
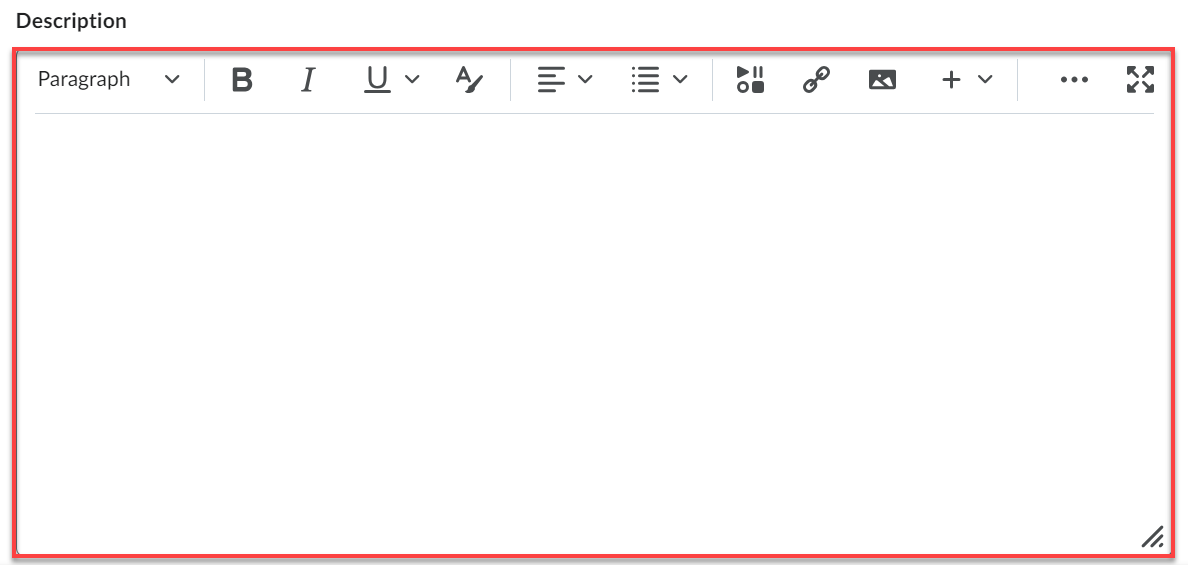
13. Enter
directions or a discussion prompt in the Description field.
Note: For further
instructions on utilizing the MyFIRE Editor, refer to the How to use the MyFIRE Editor tutorial.
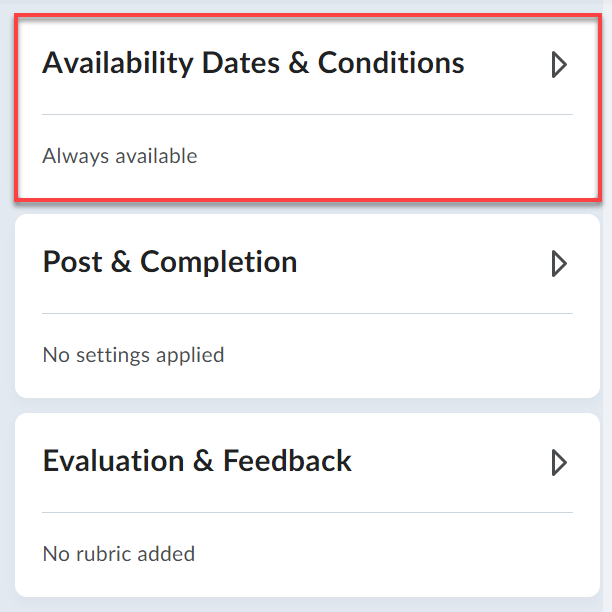
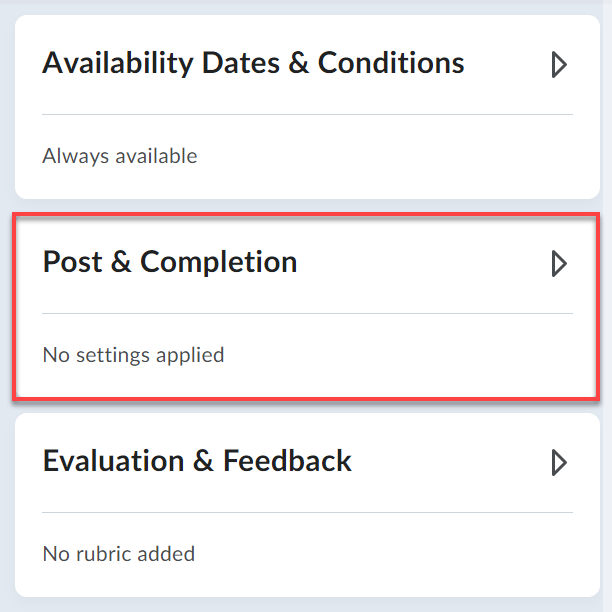
14. On
the right side of the screen, there will be a panel with additional setting
options for the discussion topic. Select the drop-down menu for the first
section, Availability Dates & Conditions. Once selected, the menu
will expand.
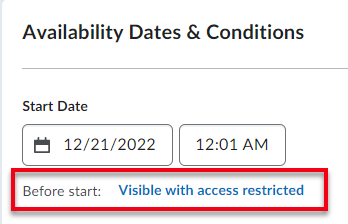
a. If desired, add a start
date to the discussion topic. Start dates will not allow students to submit
to the discussion topic until the start date and time have passed.
i. If adding a start date,
select visible with access restricted to determine how the discussion
topic will appear to students before the start date.
ii. Select the desired visibility
behavior:
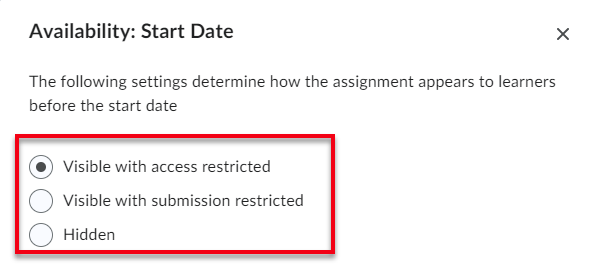
1. Visible with access
restricted- This option will allow students to view that the discussion topic exists;
however, students will not be able to see the discussion topic instructions or
be able to submit to the discussion topic until the start date has
passed.
2. Visible with submission
restricted- This option will allow students to view the discussion topic and discussion
instructions. However, the students will not be able to submit to the
discussion topic until the start date has passed.
3. Hidden- This option will
hide the discussion topic from students’ view before the start date.
iii. If desired, add the
start date to the course calendar by selecting the Add availability dates to
Calendar checkbox.

iv. Select Done at
the bottom of the pop-up window.
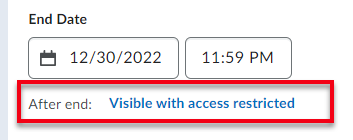
b. If desired, add an end
date to the discussion topic. End dates will not allow students to submit
to the discussion topic after the end date and time have passed.
i. If adding an end date,
select visible with access restricted to determine how the discussion
topic will appear to students after the start date.
ii. Select the desired visibility
behavior:
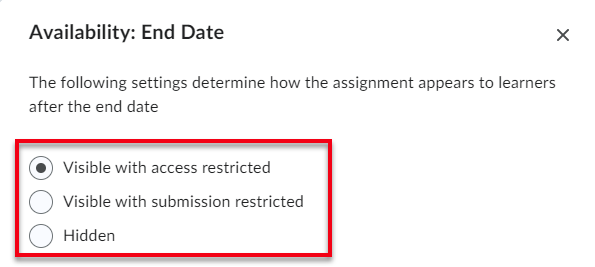
1. Visible with access
restricted- This option will allow students to view that the discussion topic exists;
however, students will not be able to see the discussion topic instructions or
be able to submit to the discussion after the end date has passed.
2. Visible with submission
restricted- This option will allow students to view the discussion topic and discussion
instructions. However, the students will not be able to submit to the
discussion topic after the end date has passed.
3. Hidden- This option will
hide the discussion topic from students’ view after the end date.
iii. If desired, add the end
date to the course calendar by selecting the Add availability dates to
Calendar checkbox.
iv. Select Done at
the bottom of the pop-up window.
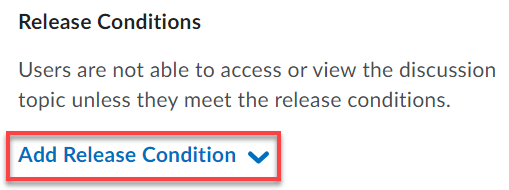
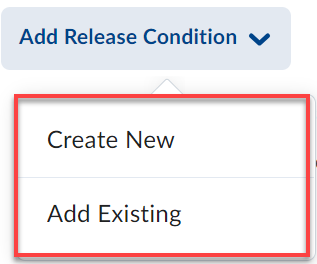
c. A Release Condition can
be added to the discussion topic by selecting add release condition. A
release condition is a prerequisite that the student has to complete prior to
viewing and gaining access to the discussion topic that is being created. If no
prerequisite is required, you can skip this step. Professors can create a new
condition or add an existing condition.
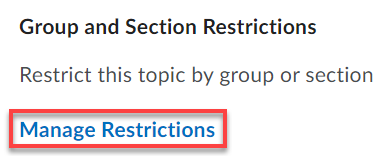
d. If needed, restrict a
topic to a group or section by selecting Manage Restrictions under Group
and Section Restrictions.
e. A pop-up window will
appear with two main options to choose from.
i. Option 1: Restrict
topic. In this option users in the selected groups/sections can view this
topic and all of its threads.
1. To select
groups/sections, select the drop-down arrows under “Select who will see this
topic” to see all the groups.
2. Check the boxes of the desired groups/sections.
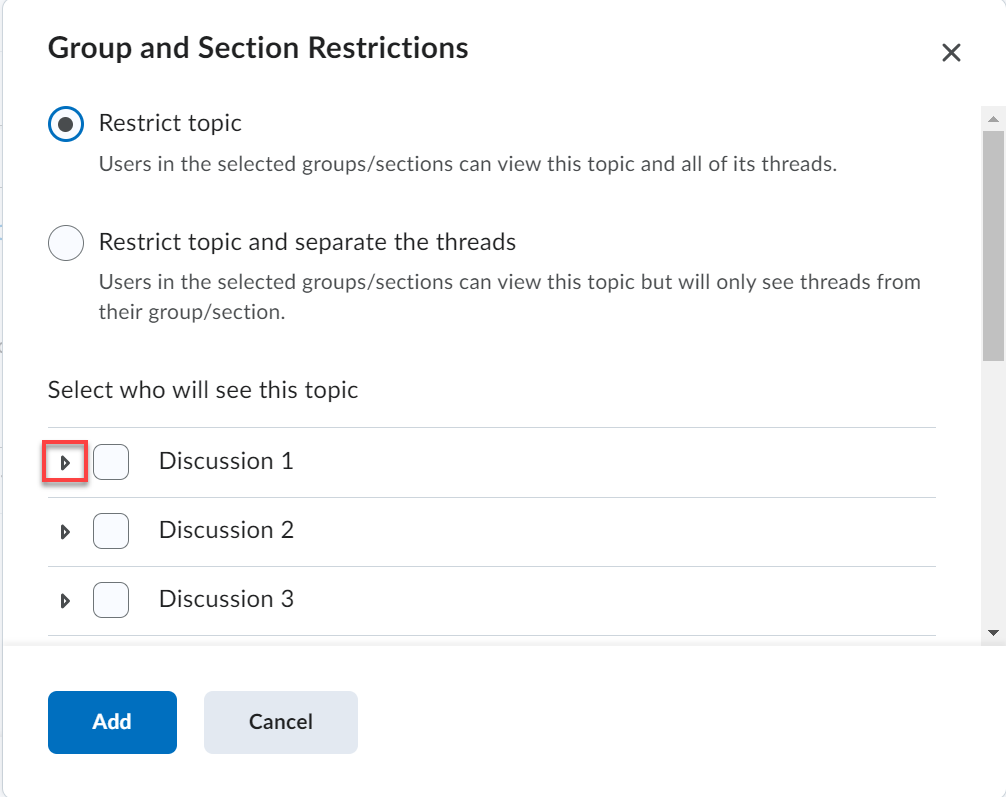
3. Select Add.
ii. Option 2: Restrict
topic and separate the threads. In this option, users in the selected
groups/sections can view this topic but will only see threads from their
group/section.
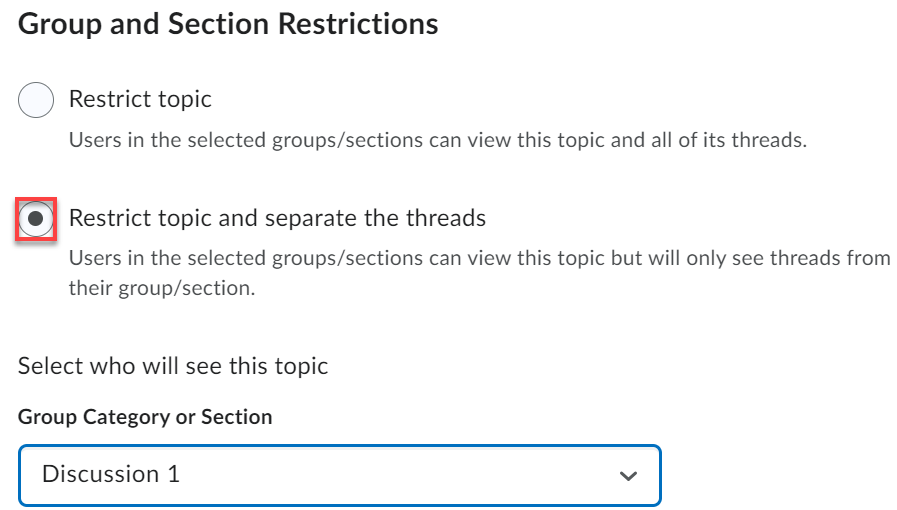
1. When this option is
selected, a drop-down menu will appear. Select the desired group category or
section.
2. Select Add.
15. Scroll
down and select the drop-down menu for the second section, Post &
Completion. Once selected, the menu will expand.
a. There are three
different settings for student’s post visibility.
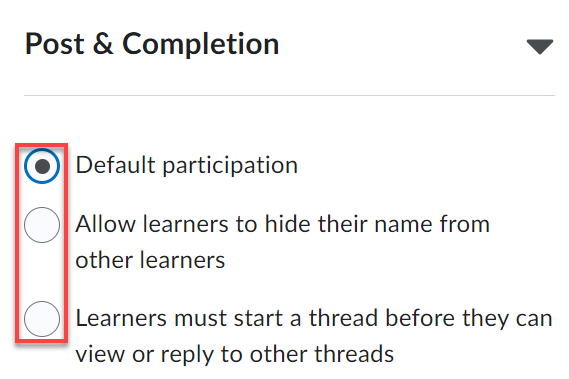
i. Default Participation- Students can select
a discussion topic and view all students’ posts before submitting their own.
ii. Allow learners to hide
their name from other learners- We do not recommend this option to be
enabled. Selecting this option allows users to post anonymously to the
discussion topic.
iii. Learners must start a
thread before they can view or reply to other threads - This option forces
users to post to the discussion topic prior to being able to view what other
users have posted.
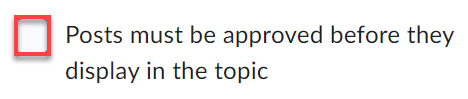
b. Posts can be monitored
by selecting the check box for posts to be approved before they will be
displayed in the topic. This option will require student posts to be
approved by a moderator before being displayed to other users. If enabled, the
instructor will be the moderator for the discussion.
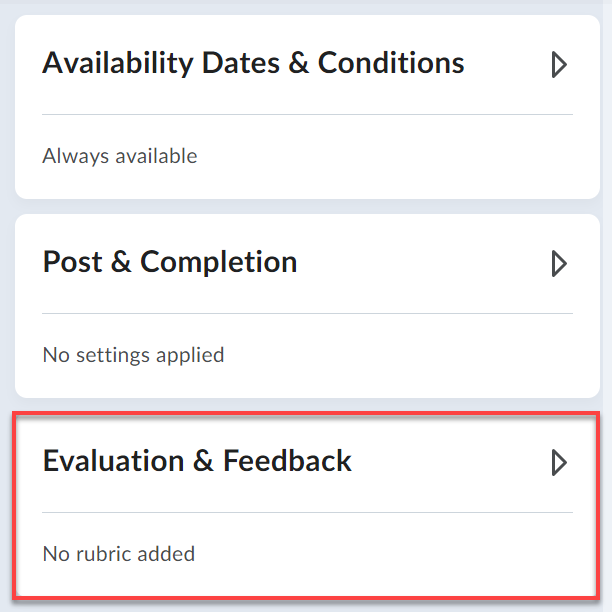
16. Next,
scroll down and select the drop-down menu for the third section, Evaluation
& Feedback. Once selected, the menu will expand.
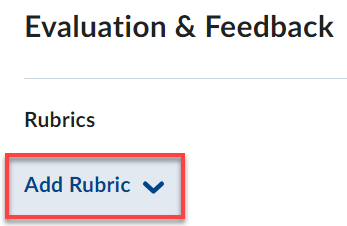
a. If desired, attach a
rubric to the assignment by selecting add rubric. Professors will have
the option of creating a new rubric or to add an existing rubric.
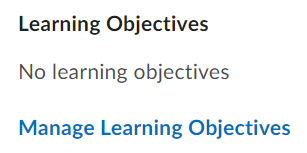
b. If interested in
attaching Learning Objectives to assignments, please reach out to idtsupport@seu.edu for further assistance.
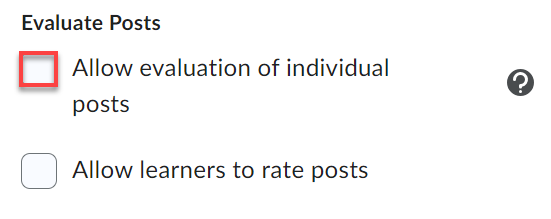
c. In the Evaluate Posts
section, instructors have the choice of enabling two settings.
i. Option 1: Allow
evaluation of individual posts. If there are no rubrics attached to the
discussion and if there should be separate individual scores for students’ initial
posts and replies, then instructors can enable the allow assessment of
individual posts if desired by selecting the allow assessment of individual
posts checkbox. This option will automatically calculate the students’ total
score for the discussion topic based on the individual post scores. Each
student post will have a separate score field. For example, if a student posts
one initial post and two replies to classmates, then there will be 3 individual
score fields. If enabled with rubrics, the assessments from the individual
posts will override the rubric feedback and scores.
1. If enabled, determine
how the total score will be calculated from the multiple student post scores by
selecting the calculation drop-down menu.
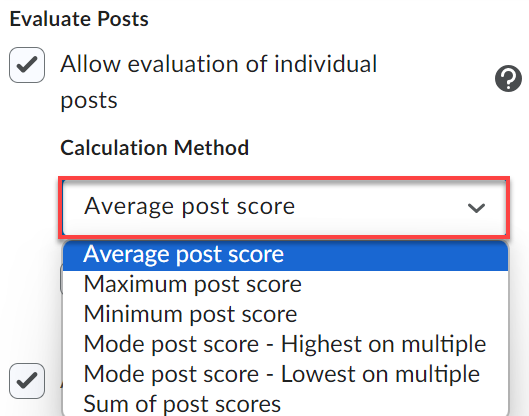
a. Choose one of the
following calculation options: average post score, maximum post score, minimum
post score, mode post score - highest on multiple, mode post score - lowest on
multiple, or sum of post scores (most utilized option if enabled).
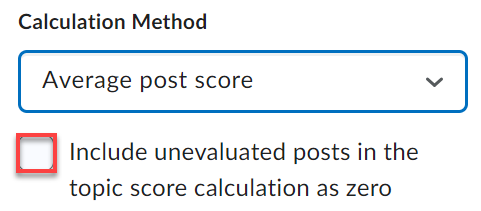
2. Additionally, if
desiring for unscored posts to automatically be calculated and scored as zero,
select the checkbox to the right of the calculation drop-down menu. This option
will automatically enter zeros for all students who have not been assessed. If
this option is not selected, then unscored posts will not be included in the
topic score calculation. ID&T does not recommend this option being enabled.
ii. Option 2: Allow
learners to rate posts. If desired, enable the rate points option by
selecting the box and choosing the rating in the drop-down menu to allow
students to rate their posts. If enabled, as an instructor, you will not be
able to view which student rated whom. Therefore, ID&T does not recommend
this option for assessed discussions. This option includes:
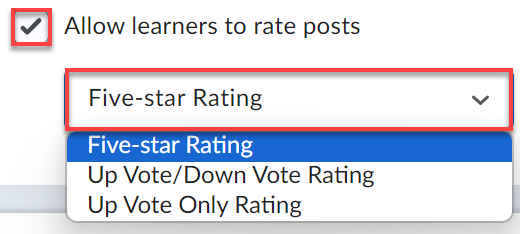
1. No Ratings- This option will not
enable ratings and hides all rating controls from users.
2. Five-Star Rating Scheme- This option will
allow users to assign each post a score out of five.
3. Up Vote/Down Vote
Rating Scheme- This option will allow users to increase or decrease a post’s rating.
4. Up Vote Only Rating
Scheme- This option will allow users to increase a post’s ratings.
17. Next,
choose if the assignment should be visible to the students by selecting the visibility
toggle at the bottom of the page to change the visibility status.
a. Open Eye icon- means that students
can view the discussion topic.
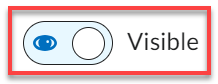
b. Eye icon with a
Strikethrough- means that students cannot view the discussion topic.
18. Select save & close at the bottom of the screen.
