
Download & Publish a Google Meet Session
MyFIRE offers a variety
of ways to communicate and schedule synchronous sessions with students. One of
the synchronous tools that are available in MyFIRE is Google Meet. Sometimes, a
synchronous session will need to be published to a course for reference later
or for students who missed the meeting. This tutorial demonstrates how to
download and publish a Google Meet session in MyFIRE.
1. Once the recording has stopped, the recording will
be saved to the organizer’s (the person who scheduled the meeting) Google Drive
account and. Note: The recording may take a little time to become available.
Once it is available, the user who scheduled the meeting will receive an email
to your SEU account.

2. If you would like to see a preview of the video,
select open in drive from the email.

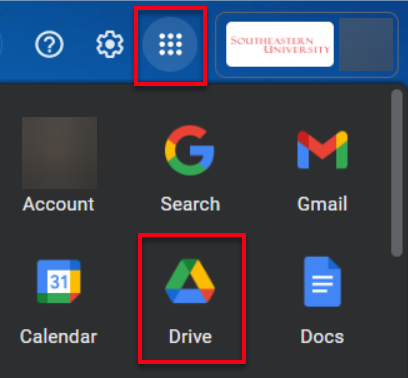
3. Next, navigate to Google Drive from your
SEU email account.
4. Search and locate the meet recordings folder in your Google Drive account.

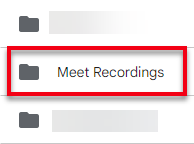
5. Once within the Meet Recordings folder, locate the desired video.

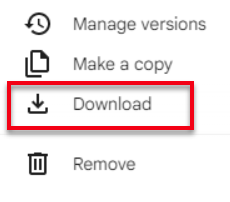
6. Select the ellipsis icon to the right of
the video title.
7. A drop-down menu will appear. Select download.
8. Locate the location where the MP4 file was downloaded. The file name will be titled the same as the
video is titled. If desired, rename the file to a preferred title.
a. Viewthe file size. If the
file size is larger than 2 GB (equivalent to 2000 MB & 2,000,000 KB), then
the video file will need to be compressed before continuing to the next
step.
i. There are a few options
that are available to compress video files:
1. https://www.freeconvert.com/video-compressor
2. https://www.youcompress.com/
3. https://clideo.com/compress-video(video will contain a
watermark)
4. Handbrake (This is downloadable software. If utilizing an SEU computer, you may need to
contact the SEU IT department for assistance.)
9. Login to MyFIRE.
10. Navigate to the desired course.
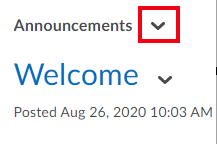
11. On the course homepage,
select the drop-down arrow to the right of the Announcement tool
heading.
12. A drop-down menu will
appear. Select new announcement from the drop-down menu.

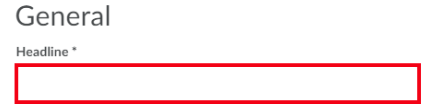
13. When the page
refreshes, title the announcement in the Headline field.
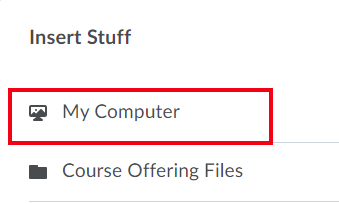
14. Select the insert
stuff icon within the HTML Editor box.

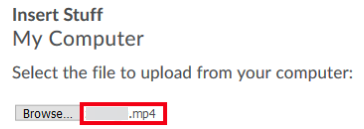
15. When the pop-up window
appears, select my computer.
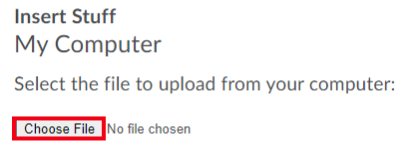
16. Next, browse for the
video file by selecting choose file.
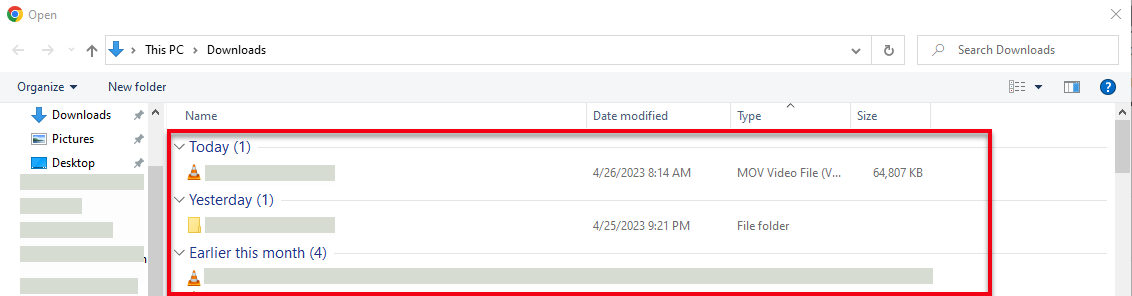
17. Search and locate the Google
Meet MP4 file on your computer in the pop-up window.

18. Confirm that the file
has successfully attached to the Insert Stuff tool by viewing the title of
the file to the right of the Choose File/browse button.
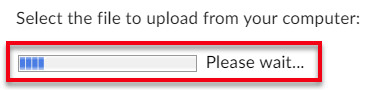
19. Then select upload at the bottom of the pop-up window.

20. The file will load.
Once the file is done loading, enter descriptive verbiage in the Link
Text field that will appear in screen readers for ADA students.

22. Complete the remainder
of the message for the announcement and set the desired announcement
settings. For further instructions on how to utilize the MyFIRE textbox,
please refer to the Utilize the MyFIRE Editor tutorial.

23. Once finished creating
the announcement, select publish at the bottom of the screen.