Within
MyFIRE, face-to-face instructors have the capability to create a rubric in a
course. Rubrics will provide students with an itemized grading scale for the
specified learning activity. This tutorial demonstrates how to create a rubric
within MyFIRE.
1. Locate
the desired course.
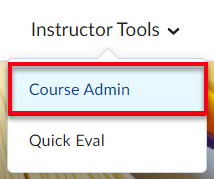
2. Select instructor tools from the navigation bar at the top of the page.
3. A
drop-down menu will appear, select course admin.
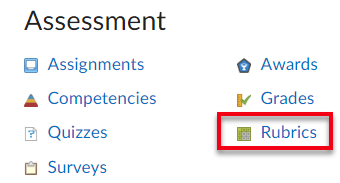
4. Under
the Assessment section, select rubrics.
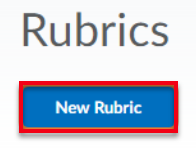
5. Then,
select new rubric.
6. When
the page refreshes, in the top right-hand corner of the screen as a best
practice, change the rubric status from published to draft while you are
editing and finalizing the rubric.
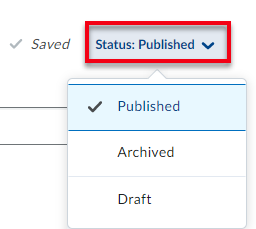
a. Published- This option means
that the rubric has been finalized and is ready to use for an assessment in the
course. Once a rubric has been published, the rubric will become available to
attach to learning assessments.
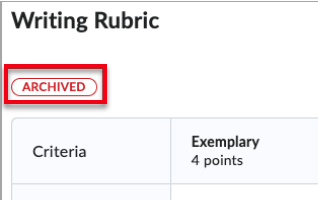
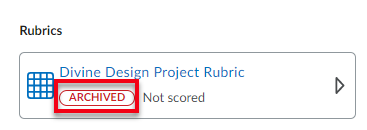
b. Archived- This option means
that the rubric is no longer in use. Archived rubrics do not appear in default
search results and cannot be added to activities. Archived rubrics can still be
evaluated and archiving a rubric does not remove it from activities or published
feedback. Note:
ID&T does not recommend this option to be selected unless the rubric is no
longer in use.
i. If a rubric’s status is
changed to archived after the rubric has been connected to an assessment, an archived
tag will appear below the rubric title where the rubric is displayed.
Students are able to see the archived tag.
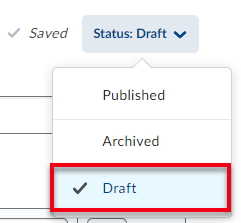
c. Draft- This option means
that the rubric is in the creation or editing phase and is not ready to be
connected to learning assessments.
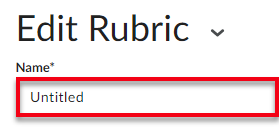
7. Next,
title the rubric in the name field.
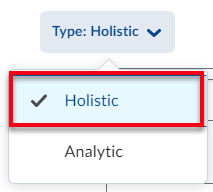
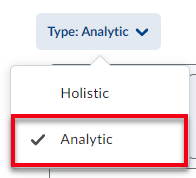
8. Under
the name field, choose the rubric type by selecting the type drop-down
menu in blue.

Note: Once a rubric type has been decided and content has been added to the rubric
fields, the system will allow the instructor to change the rubric type between
Holistic and Analytic. However, the content in the rubric fields will be
removed if the rubric type is changed.
a. Holistic- Holistic rubrics do
not separate performance into multiple criteria. Performance is assessed by
considering several different criteria factors, but the instructor makes only
one overall assessment.
b. Analytic- An analytic rubric
breaks performance into multiple criteria. Each criterion is assessed
separately, resulting in an overall assessment score. For example, for
assessing essays, there could be a separate criterion for spelling, grammar,
and expression. Each criterion can be assessed as poor, good, or excellent, resulting
in an overall assessment that adequately evaluates performance. Most rubrics
are analytic.
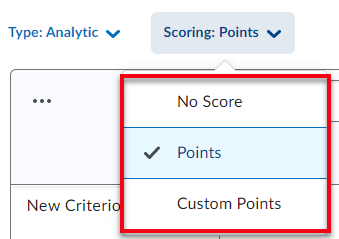
9. Next,
choose the rubric scoring method by selecting the scoring title in
blue.

a. In the scoring method
drop-down menu, select either no score, percentage (holistic),
points, or custom points.
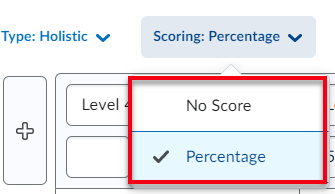
i. No Score - (Holistic and Analytic
Rubrics)
1. Performance levels
are indicated by text only. For example, three performance levels for a rubric
can be "Poor", "Good", and "Excellent".
ii. Percentage - (Holistic Rubric only)
1. Percentages are only available to holistic
rubrics. A holistic rubric using Percentages can be automatically assessed
based on the score of its associated item (for example, a Grade item)
iii. Points - (Analytic
Rubric only)
1. This scoring method is only available to analytic
rubrics. Similar to Text Only, but includes points to assess performance. For
example, three performance levels for a rubric can be "Poor (0
points)", "Good (75 points)", and "Excellent (125
points)".
iv. Custom Points - (Analytic
Rubric only)
1. This scoring method is only available to analytic
rubrics. The Custom Points scoring method is similar to the Points scoring
method but can customize the points given for each criterion. For example, if
performance levels are "Poor", "Good", and
"Excellent", then the criterion "Spelling and Grammar" can
be worth 0 points, 10 points, and 20 points for each level and the criterion
"Expression" can be worth 0 points, 30 points, and 60 points, making
it worth three times the points of "Spelling and Grammar".
10. If
desired, select reverse level order if desiring the levels to be
ascending instead of descending. This change can occur anytime with no change
to the data entered.

11. In
the top left and right corners of the rubric, a plus sign icon will
allow for additional levels to be added to the rubric if desired. By default,
four levels are provided automatically when a new rubric is created.

12. Next, title the levels as desired.

13. Enter
the desired points for each level.

a. With a Points rubric,
the points cells will be listed under the level titles.
b. With a Custom Points
rubric, the points cells will be listed in the individual evaluation textbox.

14. Hover
and select the criterion text boxes to enter a criterion title and a
description if needed.

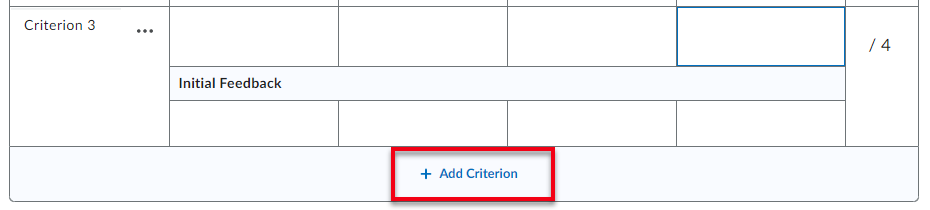
15. If
needed, add additional Criterion levels by selecting add criterion at
the bottom of the rubric grid.
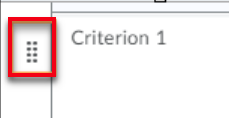
16. If
needing to reorder the criterion, hover your cursor to the left of the
criterion, and then select the eight-dot icon to the left of the
criterion and drag the row to the preferred order. More than one criterion must
be added to the rubric for this option to display.
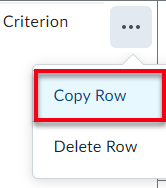
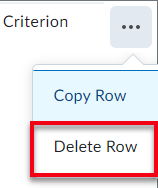
17. If
desiring to copy or delete a specific criterion row, select the ellipsis
icon to the right of the criteria title.
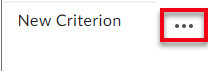
a. Copy- A drop-down menu
will appear. Select copy row. The new criterion is added under the
original with the criterion name Copy of [name of original criterion].
b. Delete- A drop-down menu
will appear. Select delete row.
18. Next,
hover and select the evaluation text boxes to enter the desired level
description.
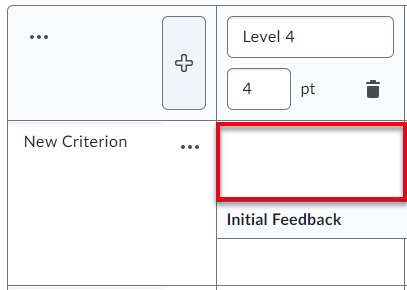
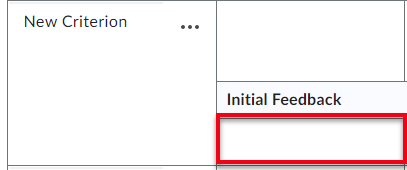
19. Hover
and select the initial feedback text boxes to enter the desired standard
feedback for the specific criteria and level. The standard feedback will
automatically populate into the rubric feedback for students saving the
instructor time.
Note:
When assessing a student, the standard initial feedback can be edited and
personalized to each student.
20. Continue
filling in the rubric by repeating steps 11-18 until the rubric is
complete.
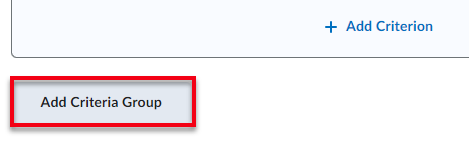
21. If
needing to add a separate group of criteria that assess the students on
different topics within the rubric, then select add criteria group.
The additional criteria group will factor into the overall score for the
assessment.
22. Next,
enter the level titles and points values for the Overall Score in each
level.
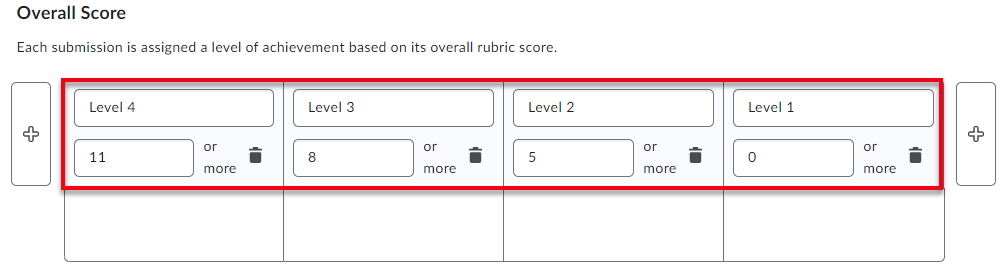
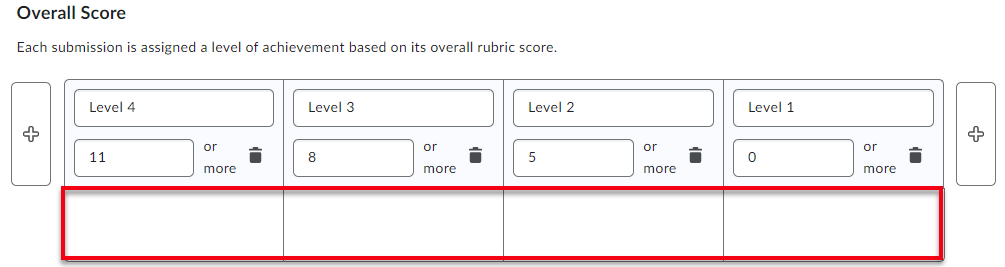
23. Enter
the desired level description or overall score feedback for each Overall
Score level.
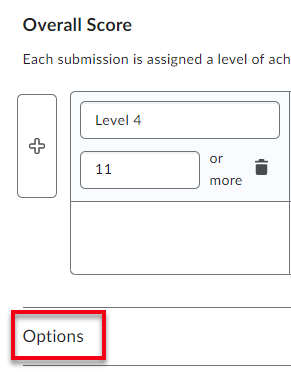
24. Then
select options to view the additional settings.
25. Choose
an availability preference for the rubric by selecting a visibility option. Options include Rubric is visible to students, Rubric is hidden from
students, and Rubric is hidden from students until feedback is published.
Note:
It is recommended to choose ‘Rubric is visible to students’. This option is
selected by default.
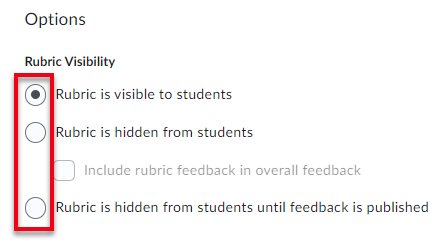
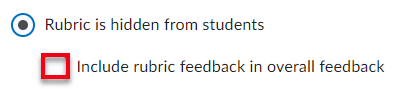
a. If Rubric is hidden
from students is selected, instructors have the option to include the rubric
feedback in the overall assessment feedback area.
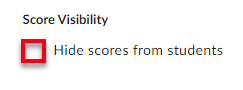
26. Then
decide if the scores should be hidden from student view. If so, select the
checkbox for hide scores from students under the Score Visibility
title.
27. Next,
add a description to the rubric for your personal reference if desired.
This description will not be visible to the students.
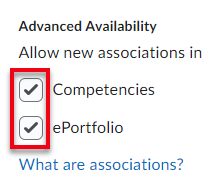
28. Under
the Advanced Availability title, the competencies and ePortfolio
checkboxes are selected by default. ID&T recommends keeping these
settings the same for student use.
29. Once
done editing the rubric and no further edits need to be made, scroll up to the
top of the page and select the status drop-down menu and change the
rubric status from draft to published. If you have not completed editing
the rubric and would like to come back at a later time to finalize the rubric,
keep the rubric status as draft and skip to step 29.
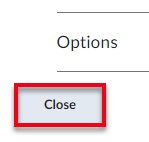
30. Then
select close at the bottom of the page.